
Build and Code a Robotic Car with Arduino
Course Description:
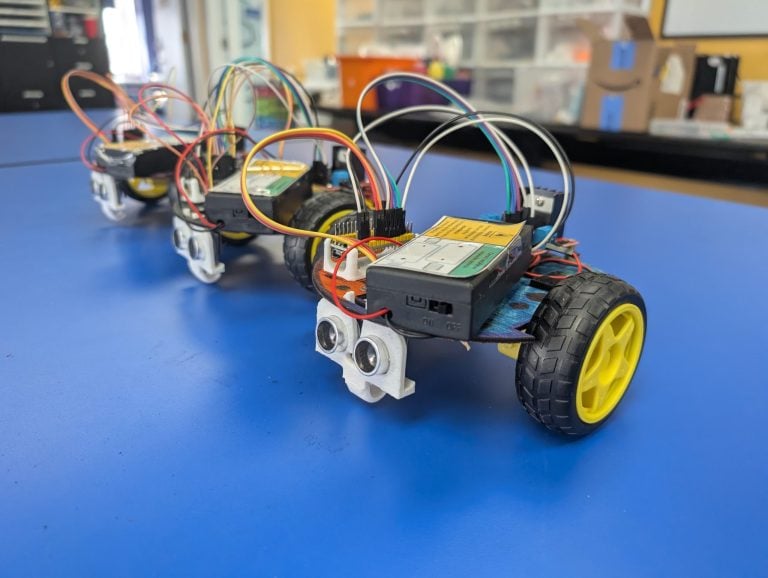
This course teaches fundamental robotics, mechatronics, and computational thinking using a block-based coding IDE. Students assemble a car chassis, motors, and a motor driver with an Arduino microcontroller. They then program an ultrasonic sensor to detect obstacles and use conditional logic to autonomously guide the robot around barriers.
Take Home Element:
Fully Programmable Obstacle Avoiding Robotic Car with Arduino Microcontroller, Ultrasonic Sensor, Motors, and Drivers
What You Will Learn
Motor Control Logic
Students learn how to use digital HIGH and LOW signals in specific combinations to control the direction and speed (PWM) of two DC motors.
Sensor-Based Autonomy
Students program an ultrasonic sensor (Trig/Echo) to gather data on distance and use conditional statements to make real-time obstacle avoidance decisions.
Systems Integration
Students assemble and wire complex electronic components, including the microcontroller, motor driver, and sensor, to a battery pack to create a fully functioning robotic system.
State Standards Alignment
This course aligns with core principles across Computer Science, Engineering Design, and Physics, including:
CSTA 1B-AP-15: Test and debug a program to address false sensor readings
CSTA 2-AP-13: Decompose problems into smaller, manageable subproblems such as building movement tables
NGSS ETS1.B: Developing Possible Solutions by improving the autonomous algorithm
CCSS-M MP.4: Model with mathematics using analog values from 0 to 255 for speed control
ISTE 5.d: Develop and employ models and simulations using the robot to model autonomous vehicles
These coding classes for kids serve students in the Aurora, Oswego, and Naperville communities.
Skills Gained
- Programming logic and algorithm development
- Problem-solving and troubleshooting
- Hands-on electronics assembly and wiring
- Understanding sensor integration and data interpretation
- Computational thinking and systems design
- Critical thinking and decision-making

Design & 3D Print in Multicolor
Course Description:
This STEM course teaches Computer-Aided Design (CAD) using TinkerCAD and explores three professional methods for multi-color 3D printing. Students learn to create complex 3D models and master techniques such as manual filament swaps, Automated Material Systems (AMS), and post-print assembly to produce multi-colored functional or decorative objects.
Take Home Element:
Multicolor Name Tag, Thingiverse print, and Game Character
What You Will Learn
CAD Design
Students gain mastery of the TinkerCAD interface for creating multi-layered designs, using holes for cutouts, and grouping objects to create complex 3D geometry.
Additive Manufacturing Techniques
Students learn to use slicer software, including Cura and Bambu Studio, to schedule print pauses for filament swaps and design objects for multi-part post-print assembly.
Engineering for Efficiency
Students analyze print time and filament usage, including the waste generated by AMS systems, to make informed decisions that balance aesthetics and cost.
State Standards Alignment
This course aligns with core principles across Engineering Design, Technology, and Mathematics, including:
- NGSS ETS1.B: Developing Possible Solutions (iterating CAD design for printability)
- NGSS K-2-ETS1-3: Analyze data from tests to determine similarities and differences (comparing AMS vs. filament swap efficiency)
- ISTE 4.a: Students use a deliberate design process for generating ideas (using TinkerCAD)
- CCSS-M MP.5: Use appropriate tools strategically (using TinkerCAD and Cura)
- ISTE 5.c: Breaking down a large problem into smaller parts (designing models for multi-part assembly)
These 3D printing classes serve students in the Aurora, Oswego, and Naperville communities.
Skills Gained
- TinkerCAD for 3D modeling and design
- 3D printing techniques
- Using slicer software for print planning
- Problem-solving and engineering decision-making
- Analyzing print efficiency, time, and material usage